Archive for July 2012

Saturday, July 28, 2012

easy timeout glitter bottles for kids {tutorial}

READ THE REST OF THIS POST -->>>» |

After attending some family counseling with my children, I ended up with some great ideas to help my boys deal with anger and frustration appropriately. My favorite is the glitter bottle. The swirling and twinkling of the glitter is mesmerizing, almost as if you're looking deep into outer space. It's a little trippy. But it does wonders for the attitude of a cranky kid! Simply hand it to them when they start to get angry and instruct them to shake instead of sending them to timeout. Here's how to make these simple timeout glitter bottles to help a frustrated kid calm down quickly.


Timeout Glitter Bottle Tutorial
 
 Supplies:
*Empty 1-liter plastic bottle with lid
*Small bottle of glitter glue
*Matching glitter
*Super glue
*Water

1.  Wash your empty plastic bottle and remove the label. If you have a difficult time removing the sticky residue from the label, try a little Citrisolv on a paper towel--works like a charm!

2. Fill your bottle about 3/4 full with water. You don't want it too full or you won't be able to shake it up properly!

3. Squeeze the contents of the glitter glue into the bottle. The glitter glue might take some time to become diluted and really work well. Just be patient and those globs will soon melt away!
 Get your child to help if they're old enough!

share this on »
{Facebook} {Twitter} {Pinterest}
6 Comments

anger management tips for kids {5 ways to help your child calm down}

READ THE REST OF THIS POST -->>>» |


I know many of you have noticed we have been posting fewer projects and tutorials over the last year. A big part of that has been my family's two cross-country moves in the last 12 months, and the addition of our new baby boy in December. But there has been more to it than that. I struggle with how much of my personal life to share here, but sometimes I think we as women need to do more to reach out and help one another through the challenges of life, especially as moms. I have been working through some serious issues with my children, and I finally realized I needed to set my priorities straight. My children are more important than this blog or any craft project, and I have cut back my time crafting and sitting in front of the computer to be more hands-on with them. I don't want to put my children's personal lives on display, but I feel sharing some of the solutions we've found to help them in their conflicts could bless the lives of other families with similar trials. 

I know I can't be the only one out there who has struggled to help their kids through difficulties like anger management, depression, and adjustment issues, right? Or even just the Terrible Twos (or Sixes or Eights for that matter)! Many children in many different situations struggle with anger management and self-control. And learning to deal with that is a part of life. Our family counselor helped us create "tool boxes" to help the boys learn to control their tempers and deal appropriately with difficult situations. They may not all work for your child, but here are some ideas that might help your child learn to manage their anger, calm down, and avoid a fight.

1. Blow Bubbles
As adults we often try taking deep breaths to help us calm down in intense situations. But each time I would suggest that my son take a few deep breaths to calm down, he would get even angrier. Our counselor suggested blowing bubbles instead. Not only is a fun, happy activity for children, but the act of blowing air through the bubble wand requires them to breathe deeply. Soon they've relaxed and calmed down to a point where they can talk a little more rationally about whatever issue is at hand. 

share this on »
{Facebook} {Twitter} {Pinterest}
54 Comments

Friday, July 27, 2012

how to make a sock monkey {guest tutorial}

We know you've heard of our friend, Melynie. We have featured many of her fabulous, creative ideas for you before and today she is sharing a great tutorial for how to make a sock monkey. Thanks, Melynie...


Sometimes I make myself crazy.  Okay, a lot.  I don't know how my husband puts up with me.  I try to load my plate much too full and it ends in minor disaster.  Well, that's why this year--this year of "homemade Christmas"--I am starting now.  I'm making rag dolls for my girls and sock monkeys for my boys.  Today's project? Sock monkeys.  I know I could buy them, but I don't think those kind come with love included.  I want my kids to have heirloom toys and quilts that I made for them.  Things I put my heart and soul into.  Maybe they won't appreciate them now, but hopefully when someday they pull out a much-loved monkey, doll, quilt, etc, they'll realize that their mother's hands created this just for them and realize how special they are to me.  Before I start crying over my grown kids, here's how I made the monkeys. 


You will need:
A pair of socks (This monkey was made with the extra large size, and makes a 21" monkey)
Fabric marker
Scissors
Needle and coordinating thread
Stuffing
2 black buttons

I looked all over online and the cheapest place I found the 'original' socks were HERE.  The socks actually come with sock monkey directions printed on the back of the label.  But in case you are more of a visual person, like me, you'll appreciate a more step by step illustration.  Cue pictures.


Turn the socks inside out.  I used a fabric marker to draw my sewing and cutting lines.
LEFT SOCK: arms on top, heel mouth, tail on lower left and ears on lower right.
RIGHT SOCK:  monkey body, legs are on the lower part. (Leave a hole between the legs--you will turn it right side out and stuff it through the crotch)
I sewed on all of the lines before I cut anything apart.  I actually sewed my seams twice because my boys are a little rough and tumble.  Trying to save myself repair work now.


These are the socks sewn on the lines and cut apart.   

Turn the pieces right side out.

Stuff the monkey. I used regular polyester fiberfill.

Then sew the monkey together.  This is the most time-consuming part. I started with the crotch, because I didn't want it to fray. With the detached (arms, mouth, tail, ears) parts, you have to simultaneously hold the part on, turn the raw edge of the sock under, and whip stitch it together.  I knotted my thread and sewed a couple loops into the body to secure it before I started stitching.
A note about the eyes:  I did a loop into the body to secure the thread before I sewed the buttons on, then loosely sewed the buttons on, pulled it tight when I was finished, and then came out behind the ear to knot.  If you know a better way, please share!!

share this on »
{Facebook} {Twitter} {Pinterest}
7 Comments

Thursday, July 26, 2012

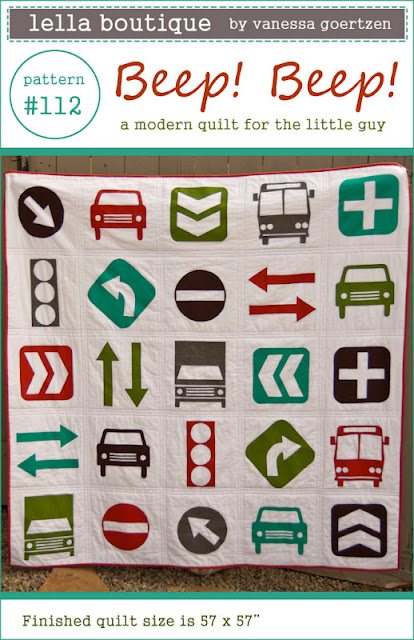
beep! beep! boys quilt pattern {giveaway winner}

UPDATED 7/26/12! New winners added!


You've been waiting so patiently for our winner of the Beep! Beep! quilt pattern giveaway--thank you! It's been a bit crazy around here with our big move. I loved reading who you would give your finished quilts to in the comments. There sure are a lot of us out there with boys who are looking for good baby or toddler boy quilt patterns! I love Vanessa for giving us this darling pattern for all our cute boys out there. And our winner is. . .

Beth Buster who said: 
Well, I have 5 boys, and my very first nephew. I would probably have to draw a name out of a hat to see who got the really cool quilt! Or, I could just make the quilt 6 different times! This is the most amazing quilt I have seen for boys!  

Kelly Simonsen who said:
Oh I love this! My son's room is getting redecorated this fall to a retro route 66 theme and this would be perfect for his bed! Thanks for the great give a way!  


Amy H. who said:
I just love this quilt! We have a houseful of boys and it would be just the thing for those chilly midwestern nights. Thanks for posting! 

Nancy Brumfield who said:
If I won a copy I would make a bunch of this quilt and send them to Quilts for Kids. A wonderful organization that gives handmade quilt to children in the hospital.  

Mhairi who said:
I would make a quilt for my son. And I would love to use some of the designs for a pillow for his bed too. Then I would probably have to make one for my little girl who loves trucks almost as much as her brother!

Give us a holler {via email} so we can get you your prize! Even if you didn't win, check out this darling cars and trucks quilt pattern or one of the fun girly patterns from Lella Boutique!

share this on »
{Facebook} {Twitter} {Pinterest}
1 Comment

Wednesday, July 25, 2012

simple addiction giveaway winner

It's time to announce the winner of our simple addiction giveaway. The lucky winner of a $50 gift certificate to the store is...

Brandy who said
"I subscribed!
blavoie1220gmailcom"

Congrats, Brandy! We have passed your email address onto the sponsor so they should be contacting you soon.

share this on »
{Facebook} {Twitter} {Pinterest}
2 Comments

Monday, July 23, 2012

creative ways to bring art into your home


Image by Jeremy Levine

The easiest way to add art to your home decor is to hang paintings and photographs on the wall, but this approach will only take you so far. Achieving a home decor that has art, style and diversity requires some alternative strategies. Here are five creative options that provide just that:

Alternative Wall Hangings

If you have additional wall space but need diversity, then consider posters, prints and even quilts. We tend to associate posters with the bedrooms of teenage boys, but movie posters can be very artful and a great way to showcase your taste in film. Do not, however, apply posters directly to the wall. Use a frame and picture hanging wire, just as you would with a painting. With quilts, we tend to associate them with rustic appeal, but plenty of commercial quilts have a much more modern aesthetic.

Art Books

Do not limit artwork to what you can hang on your walls, think outside the frame! Art books are an excellent alternative, and look great on a table in your den or living room. The easiest way to integrate art in this manner is coffee table books. An advantage to this approach is the flexibility it provides. Replacing hung art requires some consideration, but you can swap coffee table books in and out to suit a season or even a mood.

Accent Tables and Decorative Lighting
Effective decorating requires efficient use of space. You’ll never have enough of it, and simply adding more art usually isn’t the right approach. An alternative strategy is to identify decor elements that aren’t adding enough to the room’s atmosphere and replace them. For instance, you can replace a standard table or desk lamp with an artistic accent table or decorative lamp.

Accessorize

Art is much more than just paintings and furniture. It can be a vase, a candle, a teapot or a ship in a bottle. Candles and incense and oil burners are a great way to add a piece of art to a room while adding something functional as well.

Rugs

When you run out of room space and wall space, turn your attention to the floor. A rug should not be considered a mere component for bringing the room together. A rug is a medium for art in its own right, and with custom rugs available, the possibilities are endless for making your home feel expressive of your own aesthetic inclinations.

Be Creative

When it comes to your home decor, think outside the proverbial box. How do you do that? Earlier, we mentioned identifying elements in a decor that weren’t pulling their weight. Don’t be afraid to be aggressive and take chances. Works of art don’t just come from stores. Mix and match, and find inspiration nearby, especially at local garage sales.

share this on »
{Facebook} {Twitter} {Pinterest}
2 Comments

Thursday, July 19, 2012

make a framed rock collection tutorial {crafting with boys}


When it was time to start packing up our belongings for the move, I had to break it to my son that he couldn't take his 20lbs. of rocks from his rock collection to Utah with us. Here is just a portion of his collection (also displayed for sale, for the right price).


He was honestly pretty heartbroken about it, which means I wanted to give in and let him sneak them in the bottom of a box. But then I had a better idea. Why not let him pick out his very favorite rocks and make a framed collection that he could actually display in his new room? Plus, this gave me a chance to craft with my boys, which they are less and less interested in these days. Bonus.

How To Make A Framed Rock Collection


Supplies:
*Frame with backing, glass removed (hopefully it came with a piece of cardboard in the back)
*Mounting adhesive for heavy materials (I used Loctite tape), or a heavy glue like Gorilla Glue
*Patterned scrapbook paper
*Paper glue or tape
*Rock collection, cleaned (I used alcohol and cotton balls per the mounting tape's instructions)


1. After thoroughly cleaning your rocks, have the rock collector line up rocks the way they want them to be in the frame.

2. If you have a piece of cardboard in the back of your frame, use this for your base. If not, cut a piece to fit your frame. Then cover the cardboard with patterned paper (I had to overlap two pieces to make it big enough).

3. Cut a small piece of mounting tape and adhere it to the back of each rock. Peel off the backing and stick it carefully in place (with the Loctite tape, you do not have a chance to reposition, so be sure you put it where you want it!).

4. Continue with all rocks until your cardboard is full. Place the cardboard in the frame and replace the backing. Hang!

Here are some of my son's favorite rocks. He really has an eye for cool rocks!

I love that we'll be able to hang this in his new room to remind him of our time in Iowa, as well as display some of his amazing finds. And we had a great time making it together!


This is a great summertime craft to do with boys (girls, too!). Pin it now to pull out when your kids get bored this summer! And follow my Summertime Fun board on Pinterest for more crafts and activities!

share this on »
{Facebook} {Twitter} {Pinterest}
11 Comments

Tuesday, July 17, 2012

simple addiction giveaway

We are excited to introduce you to Simple Addiction. They are an online daily deals boutique that brings you 50-80% off beautiful products, creating a Simple Addiction to your life! They bring you unique vendors that offer quality products at a great price. Who doesn't love that? Take a peak at some of the items they offer...

Really, they offer all sorts of fabulous items! I have seen lace shirts, color jeans, cute boy leg warmers, jewelry and more! You really need to make sure you sign up for their emails to make sure you don't miss an item. You need to act fast because most deals end in a day or two.

Today, Simple Addiction is offering one of our readers a chance to win a $50 gift card to their online store. I am so jealous of all of you! To enter, you need to go to Simple Addiction and subscribe to the email list to receive the deals, then leave us a comment letting us know you did it. For a second entry, you can like Simple Addiction on Facebook and tell us about that too. Do it before Saturday, July 21st at 11:59pm PT when this giveaway will close.

share this on »
{Facebook} {Twitter} {Pinterest}
67 Comments

decorating a living room {designer tips-guest post}


Decorating a new space can seem like an overwhelming project, but it doesn't have to be. Read on for a few professional tips on how to liven up a room with very little effort. We'll walk you through your living room piece by piece.

Curtains
Curtains hang at eye level and are often the first thing you see when you walk into a room. Because they're located so centrally, curtains have a lot of beautifying power for textiles that occupy such a small space. When choosing curtains, take their centrality into account and splurge here even if you have to skimp somewhere else.

Sofas
Your living room's sofa functions as an anchor piece. Because it takes up so much space, it really sets the theme of any room's design. Here is where professional decorators make the boldest statement about their design point of view.

For a bright and bold living space, don't be afraid to choose a couch with a pop of bright color or a fun, bold pattern. For classically modern spaces, go with solid black, white or earth tones to lend gravity to a space. For an upscale atmosphere, you can't beat the upgrade power of a leather piece.

Other Furniture
The trick with additional furniture in a living room is that it can either beautify or clutter a space. If you have the room, a sectional with matching recliners create a beautifully homey atmosphere. But before you buy the pieces, measure the dimensions of the room to make sure your chosen furniture set fits.

For smaller spaces, skip the recliners. Go for smaller chairs to provide seating. Wing back chairs complement traditional decor. Go for mid-century modern or other dynamically designed chairs to complement a modern decor. Whatever you choose, make sure they match or complement your sofa -- your anchor piece.

To finish the room off, pick out a coffee table and/or end tables. These accent pieces offer you a chance to go bold and get adventurous with your choice. Don't feel reined in by the existing design of your chairs and sofa.

Wood accents on a sectional do not demand a wooden coffee table. Consider the elegant look of stainless steel and glass, the rustic look of tree stump tables or go completely off script with something whimsical and fun like a converted printing press tray covered in glass.

Coffee Table from Shop 4 Furniture
Rug
The old adage "a rug really ties a room together" is still true. If the sofa is your living room's anchor, then your rug is the net. The key to picking a beautiful rug is not to get match-y. You want your rug to complement the colors in a room, not mimic them.

The best way to pick a rug for a space is on the internet from the comfort of your living room couch. This way you can compare what you see on your screen to what's sitting in front of you. Keep an open mind and look at deep shag's, bold prints, traditional oriental patterns and whatever else the World Wide Web has to offer.

If you can, let your intuition decide what will look nice. If you prefer to go by decorator's rules, here's a tried and true one: take the dominant color in your living room. If you've followed this decorating guide so far, it will be the color of your couch and/or your chairs. Now pick out a rug that has just a hint of that dominant color. Alternatively, choose a rug whose dominant color is exactly opposite that color on a color wheel. Follow those rules and you can't go wrong.

Wall Décor
A living room with bare walls can hardly be called a complete look. Your wall decoration is the place where you really let your personality shine. The options are unlimited and largely up to your personal taste.

For a classic look, you can always go with framed paintings. Or, consider going for something different. Some people prefer putting their favorite records (or thrift store finds) on the wall using picture mounts. Others prefer board-mounted posters for a more casual look.

When considering your choices, don't forget functional items. Bookshelves -- especially the floating kind -- provide decor and storage space. Clocks are decorative accents and time pieces. Crates and decorative boxes can also be screwed right into the wall for cutting edge, floating storage space.

Now that you've finished this decorator's primer, you're ready to start on your journey. Remember to relax and follow the dictates of your tastes and wants whenever possible. Invest in pieces that you love and your living room will become your own personal sanctuary.

share this on »
{Facebook} {Twitter} {Pinterest}
1 Comment

party city gliding balloons

Have you seen the Party City Gliding balloons collection? Party City sent me one of these right before my son's 8th birthday and it was so fun! These balloons are kid-sized and my son couldn't believe his eyes when he opened up his door on his birthday morning and saw a Buzz Lightyear balloon that was taller than him!


He brought the balloon to his birthday party and all of the kids loved it. Most birthday balloons are a lot smaller and I think the kids just loved seeing a balloon that was their size!

Party City was also a great place for me to fill up goody bags for the party. They have so many items that are inexpensive and perfect for kids parties.


I was really impressed and the kids loved their goodies! I will definitely be shopping at Party City again for the next party we have.

share this on »
{Facebook} {Twitter} {Pinterest}
1 Comment

Sunday, July 15, 2012

ribbons and bows oh my! giveaway winner

Time to announce the winner of our ribbons and bows oh my! giveaway.  The lucky winner is...

LuckyStarCreator who said,
"the sheerly glitter ribbons would make the cutest hair accessories for my princess"

Congrats! I have sent you an email so check your inbox!

share this on »
{Facebook} {Twitter} {Pinterest}
Add a comment

Friday, July 13, 2012

beep! beep! boys quilt {pattern giveaway}

Many of you know that between Jessica and I, we have six boys, zero girls. Not that I'm complaining AT ALL, but I do have to say that girl quilts are usually more fun to make than boy quilts. Except every once in a while, when a darling quilt pattern like this comes along! I'm in love!

My little guy still does not have a quilt from me yet. Yet. I will get to it before he's one! And I love that this quilt, Beep! Beep! by Vanessa of Lella Boutique, might actually make it possible! It's a pretty simple design with super simple quilting (straight lines are my favorite).

Vanessa says that this is a quilt anyone of any sewing skill level can make. It utilizes simple applique technique; most of the work is tracing and cutting out the car and arrow shapes! The comprehensive pattern is available in her shop in PDF or paper format.

And because Vanessa is so sweet, she is giving away 5 copies of Beep! Beep! to our readers! To enter to win a paper OR digital copy of this quilt pattern, just leave us a comment and tell us what you would do with this pattern if you won. Would you make it for your own little guy, or a nephew, a friend's baby? Would you use that boy fabric stash you've been holding on to for years, waiting for the perfect quilt? Let us know by Thursday, July 19 2012 at 11:59pm PT--we'll post the winners on the 20th. Can't wait? Order the the pattern from Vanessa's shop now!

share this on »
{Facebook} {Twitter} {Pinterest}
86 Comments

Thursday, July 12, 2012

burlap and paper wedding banners {tutorial}

My husband and I just celebrated 13 years of marriage last month, and our entire life together has been completely focused on a long road of school and training. That is all we've known. This month he completes his training and will start his first real job. I am almost afraid to say that out loud--it doesn't seem real! I am so proud of him for all the hours of hard work and the dedication he has put into his education. He is so amazing, and I am so in love with him! So when I made this simple burlap wedding banner for a dear friend, all I could think about was how lucky I am to be living my own "Happily Ever After" with my sweetheart!


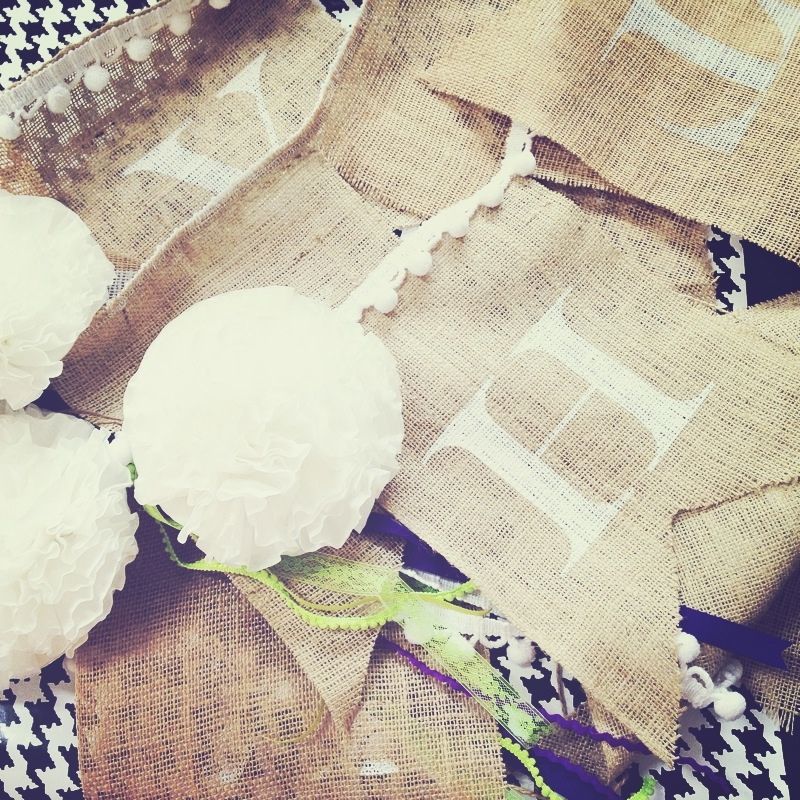
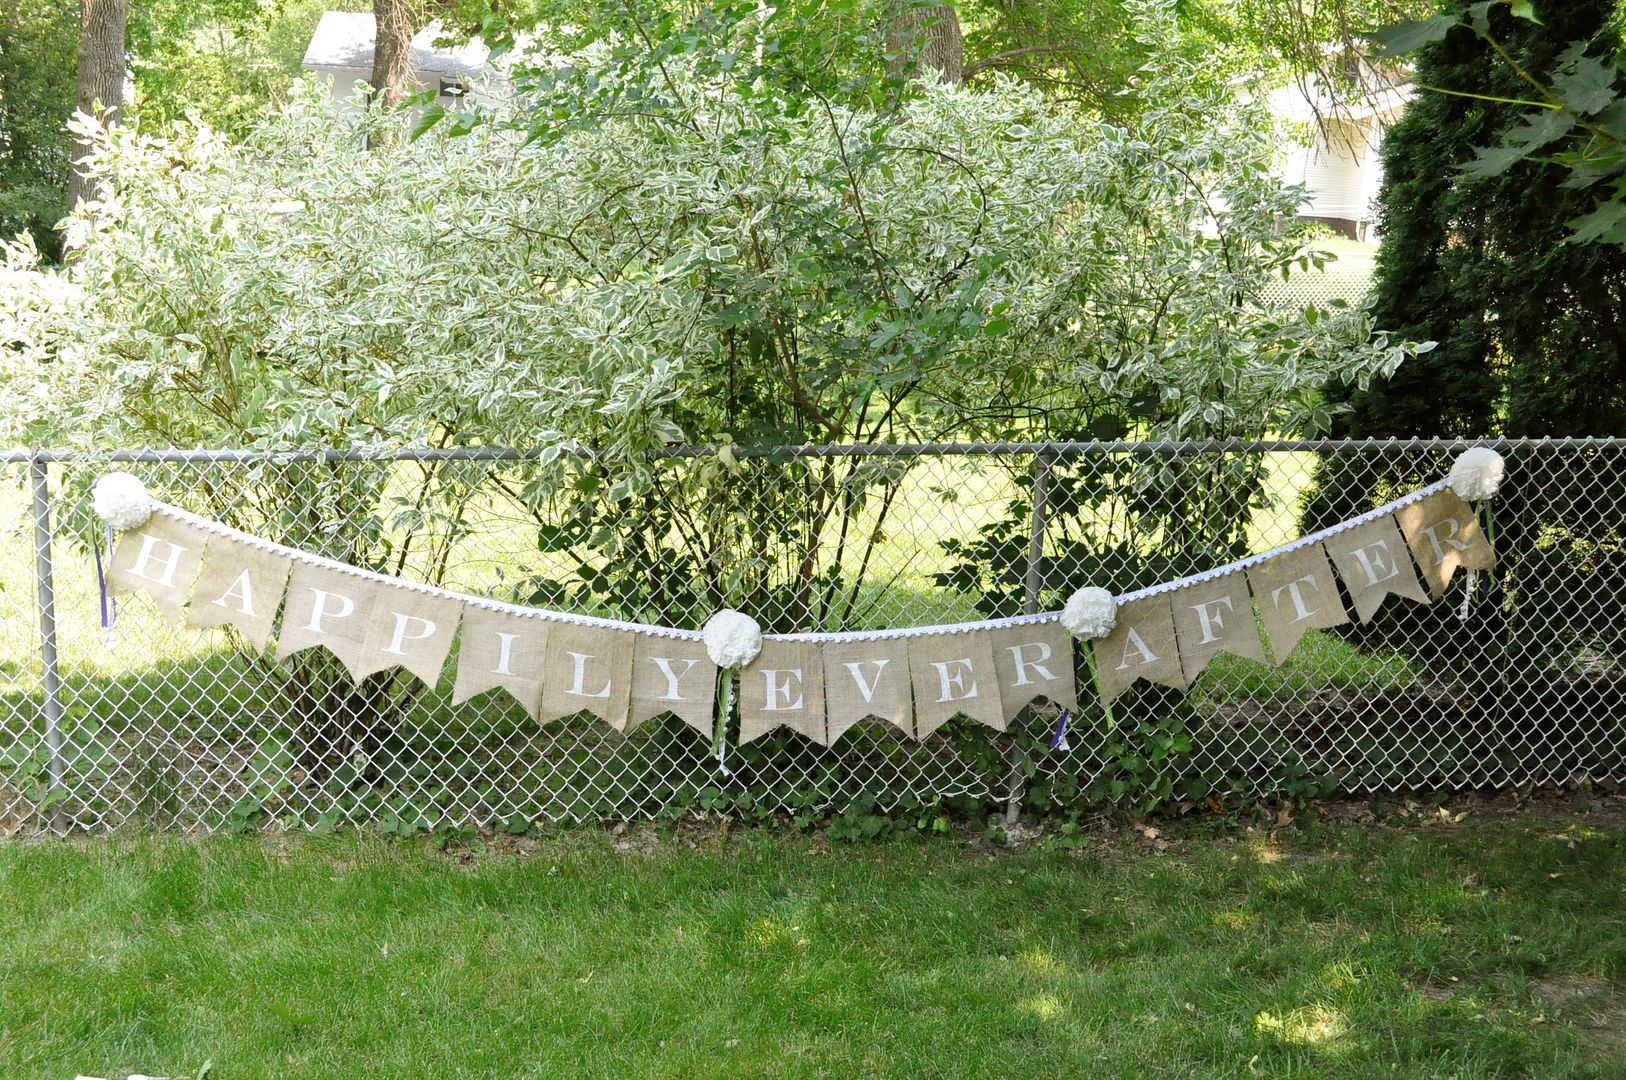
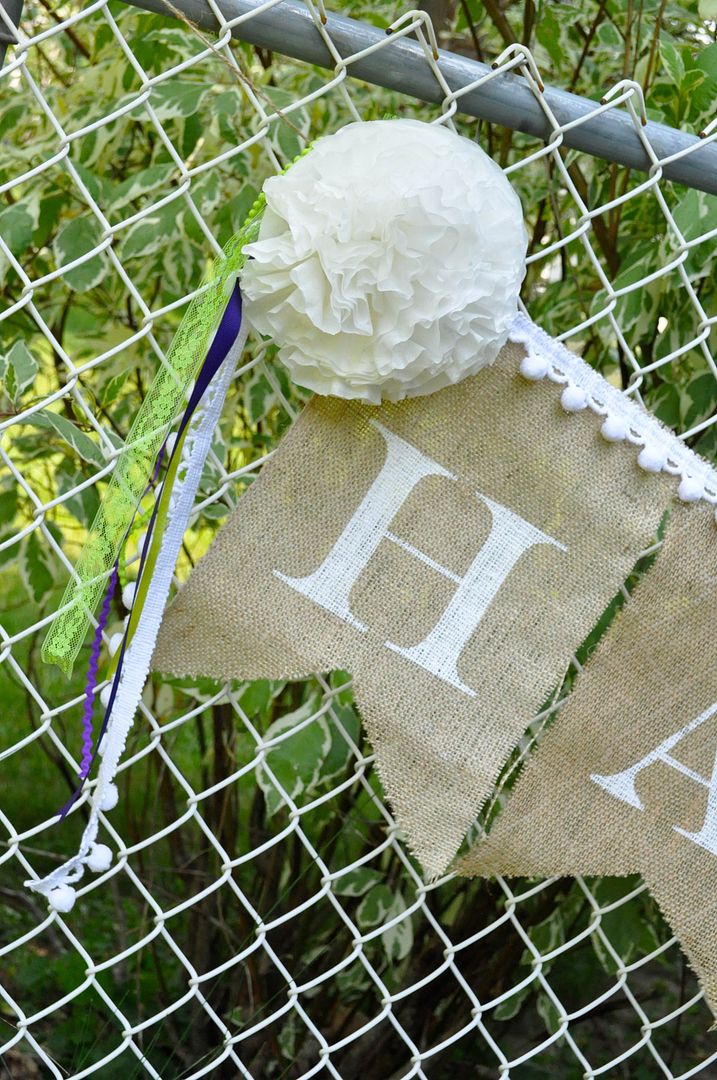
Wow, that was a fair bit of cheese. Sorry. I do have a burlap wedding bunting tutorial for you. I was asked to make a very large burlap banner and two paper banners for the cutest girl's wedding reception. This burlap bunting reads "Happily Ever After," and I used large coffee filter flowers and ribbon in the bride's colors to separate the words. 


How To Make a Burlap Wedding Banner
Supplies:
*Burlap (I used 2 yards to create this extra large banner)
*Scissors
*Freezer paper
*White acrylic paint (I used Martha Stewart's satin finish craft paint in Wedding Cake)
*Coffee filters
*Ribbon
*Pom pom decorator trim
*Sewing machine & hot glue

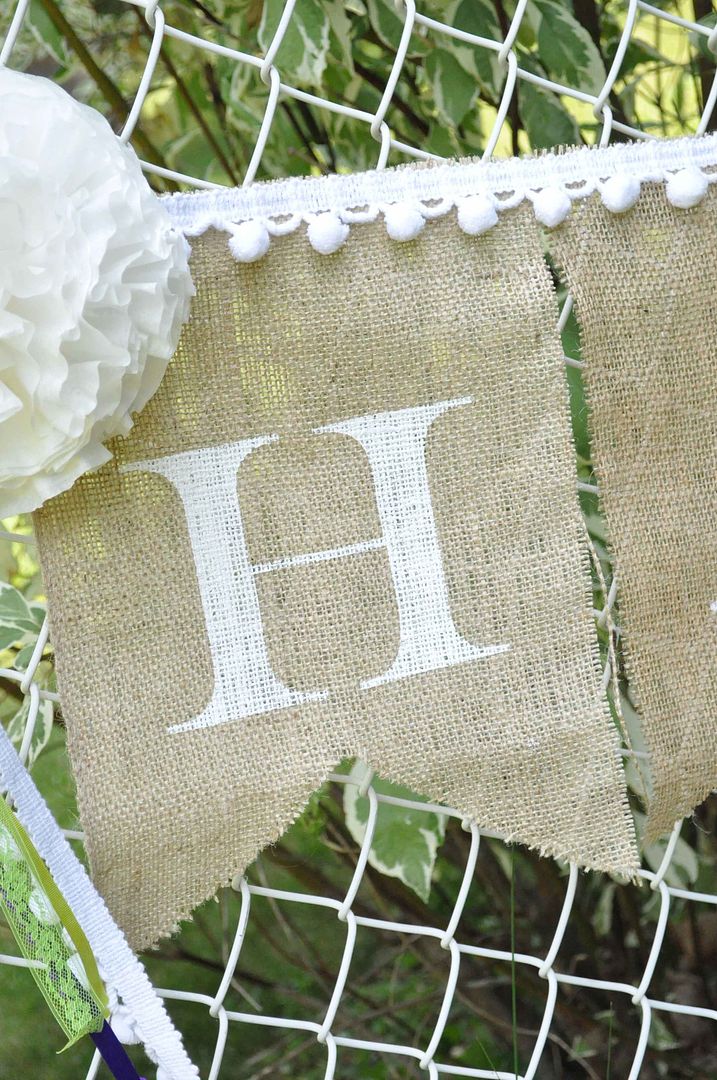
To create the pennants, I started with natural burlap from the fabric store (about 2 yards) and cut it into pieces about 10" wide by 13" long. But be sure to measure your space first to see how long the finished banner needs to be, then calculate the width of your pennants. To make the "v" in the center, I folded the pennant in half and cut on a diagonal toward the center (make one and use it as a template for the rest of your pennants). For a great tip for how to cut burlap straight, see this post.

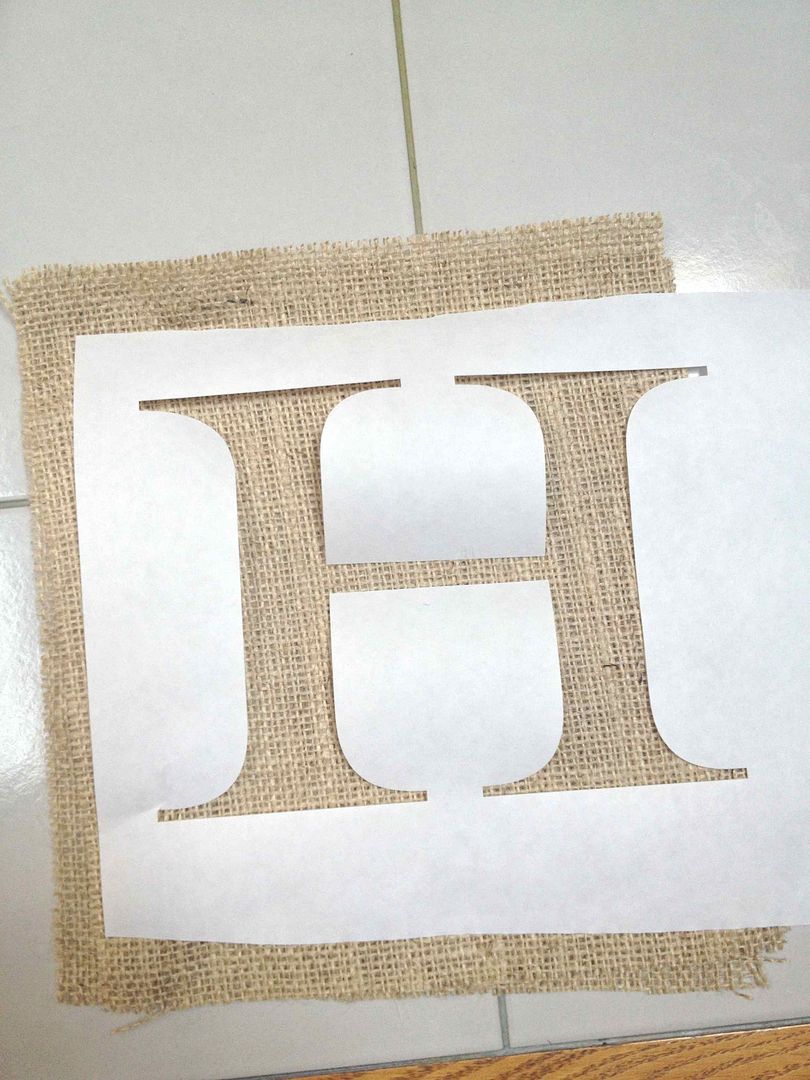
I cut my templates out of freezer paper using my Silhouette machine, but you could also print them on the freezer paper and cut them out with an Exacto knife. But sure to print/cut with the non-shiny side as your front.

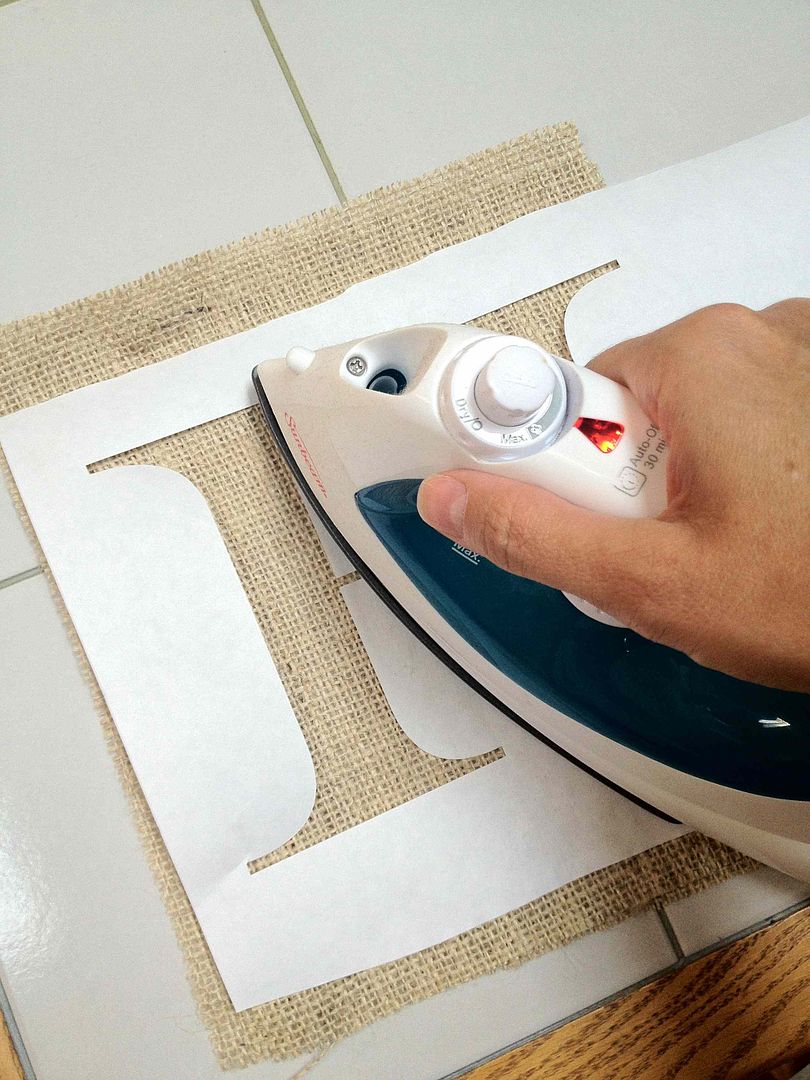
With an iron on a low setting, iron the freezer paper in place--just a quick pass with the iron will be sufficient (see more uses for freezer paper in this tutorial). 

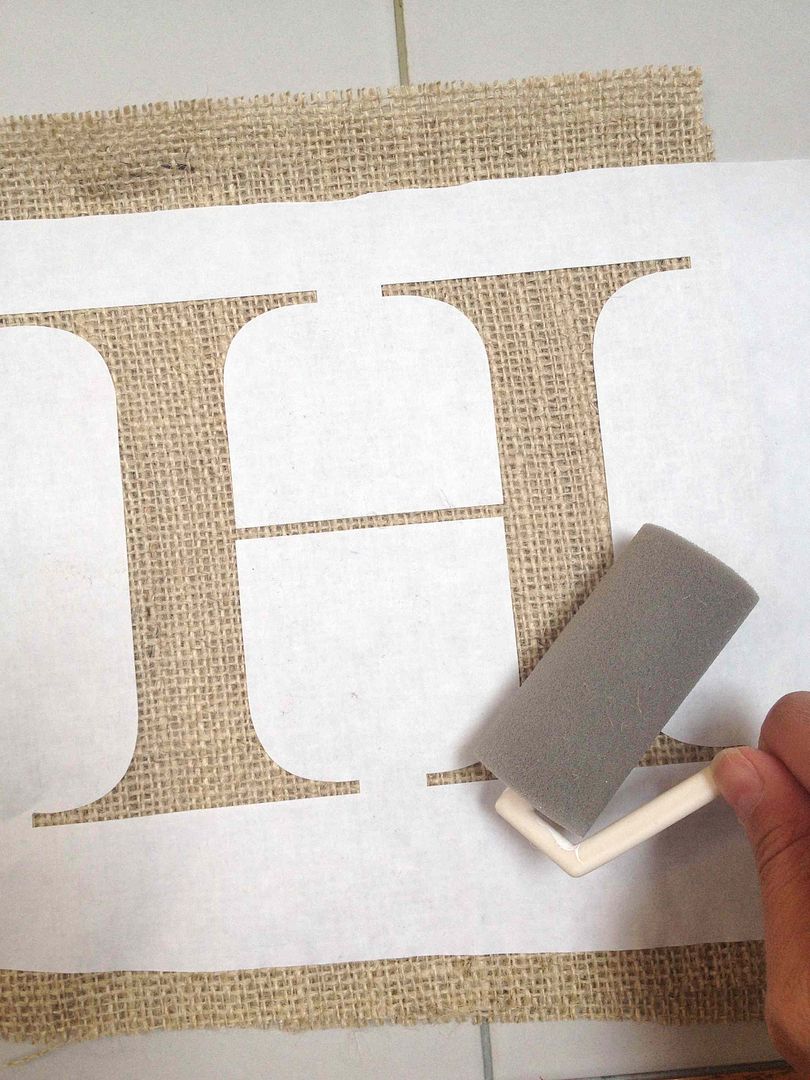
Then use a roller brush to paint your letters with acrylic paint. I like Martha Stewart's rolling sponge brush and Wedding Cake craft paint in satin finish. (Yes, I realize there is no paint being used in this picture--I forgot to take a picture when I was making the banner and by this time my paint was all packed!) Carefully peel the freezer paper stencil off the burlap. 

Voila!

I stitched a long piece of pom pom trim from the home decor section (the most expensive part of the banner--be sure to use your 40% or 50% off coupon!) to the tops of the pennants to hold it all together, then tied the ribbons onto the trim between words and on each end, and hot glued the coffee filter flowers in place.

The painting of the stenciled letters was a lot easier than I expected it to be. And the bunting really was much more beautiful in person!

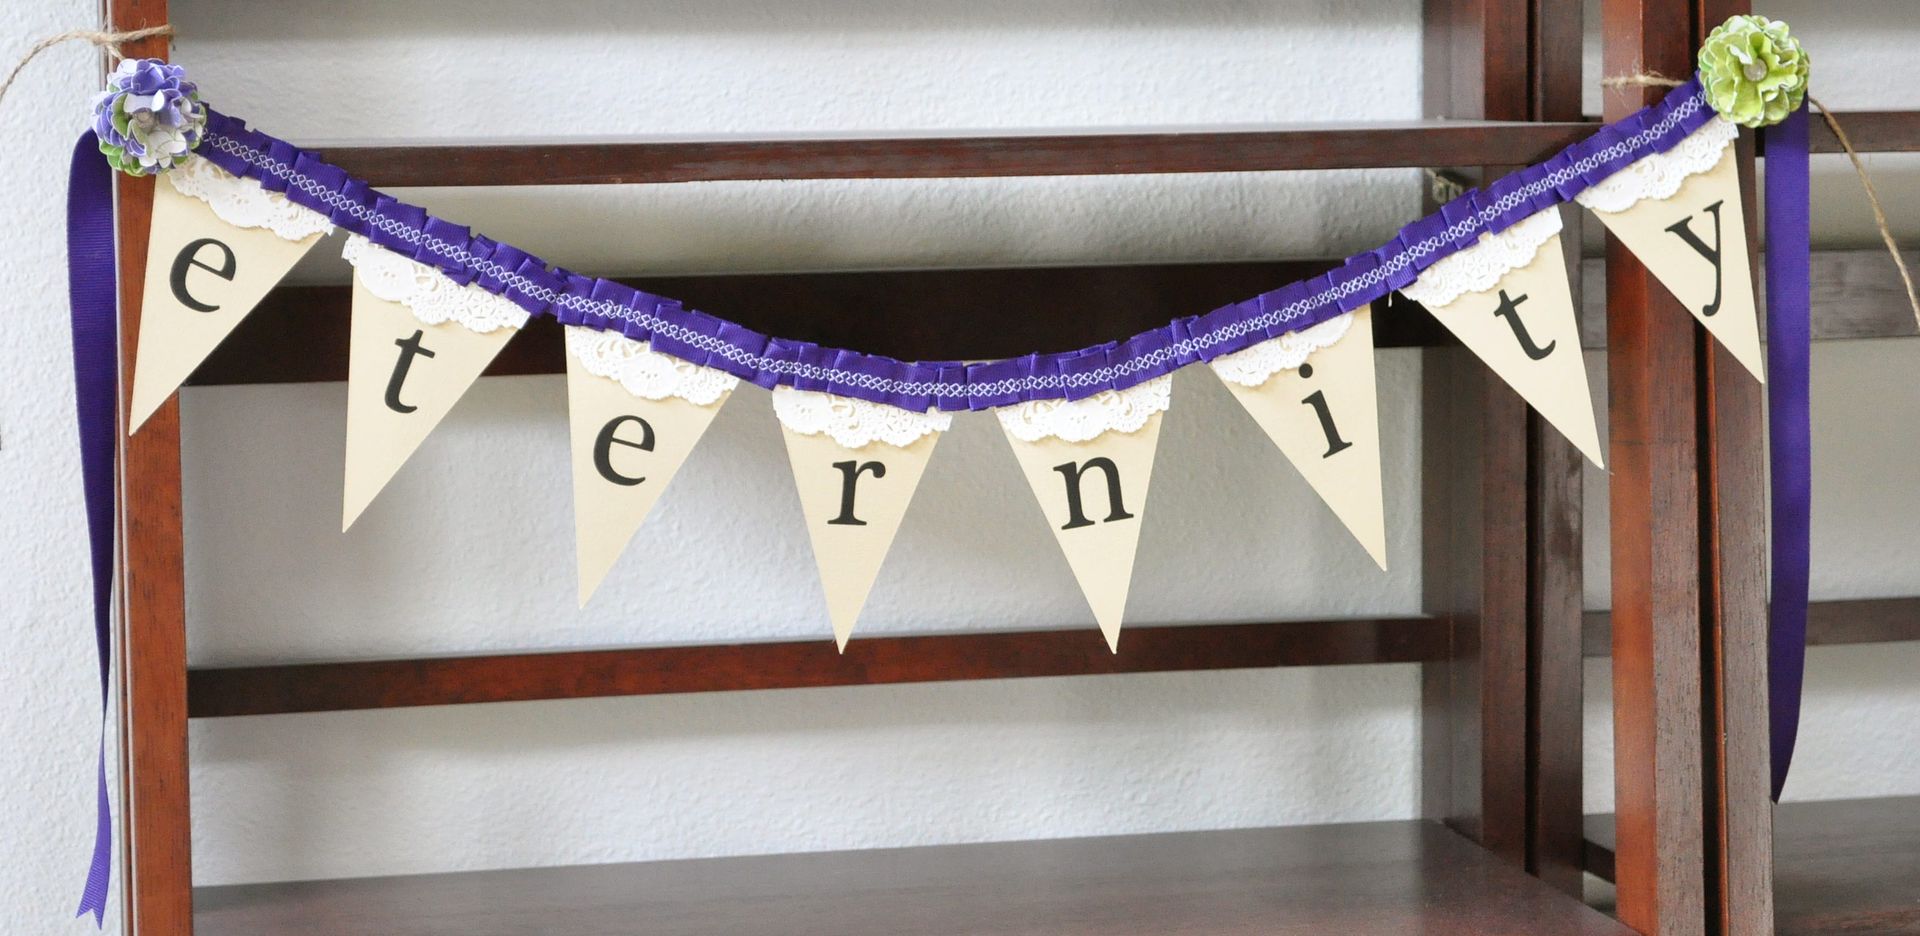
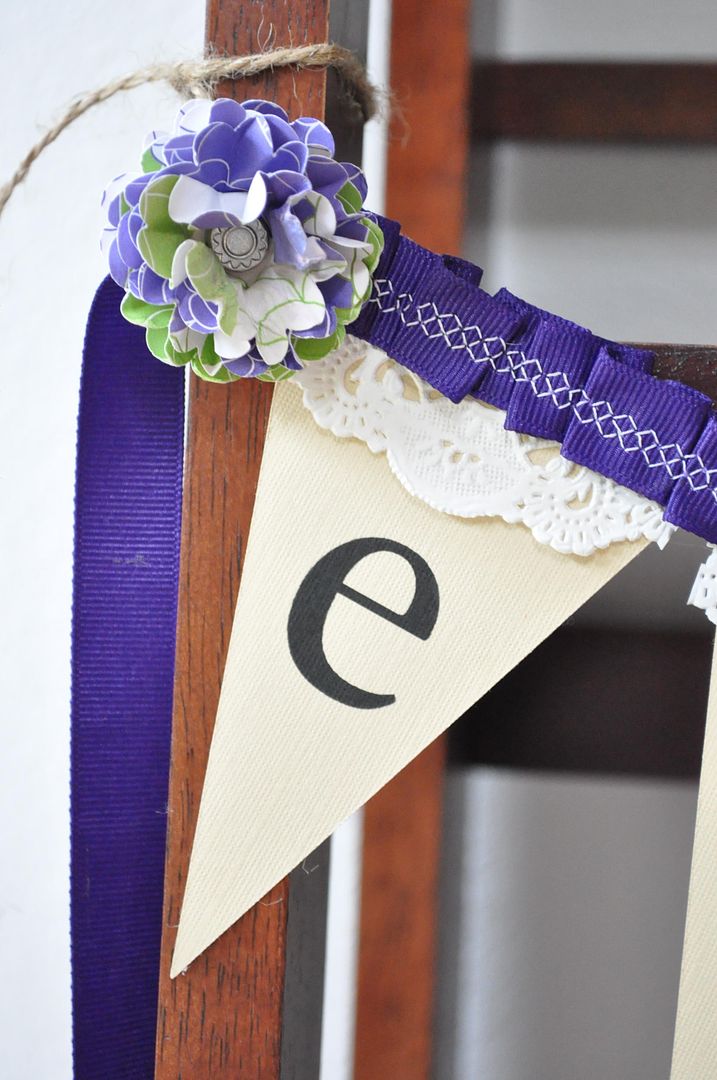
She also asked for a small paper banner reading "Eternity." I used Silhouette's print-and-cut feature to center each letter on the card stock, print it, then cut a triangle pennant shape around it. That really is the easiest way to do it, but you could also print your letters and then use a template to center the pennant around the letter and trace and cut.

I folded a small paper doily over the top of each pennant, then added some pretty stitched ruffled ribbon (tutorial here) and glue it in place. Actually, I used Scor-Tape, my favorite double-sided tape. Then I added a little layered paper flower with a flower brad in the center.  

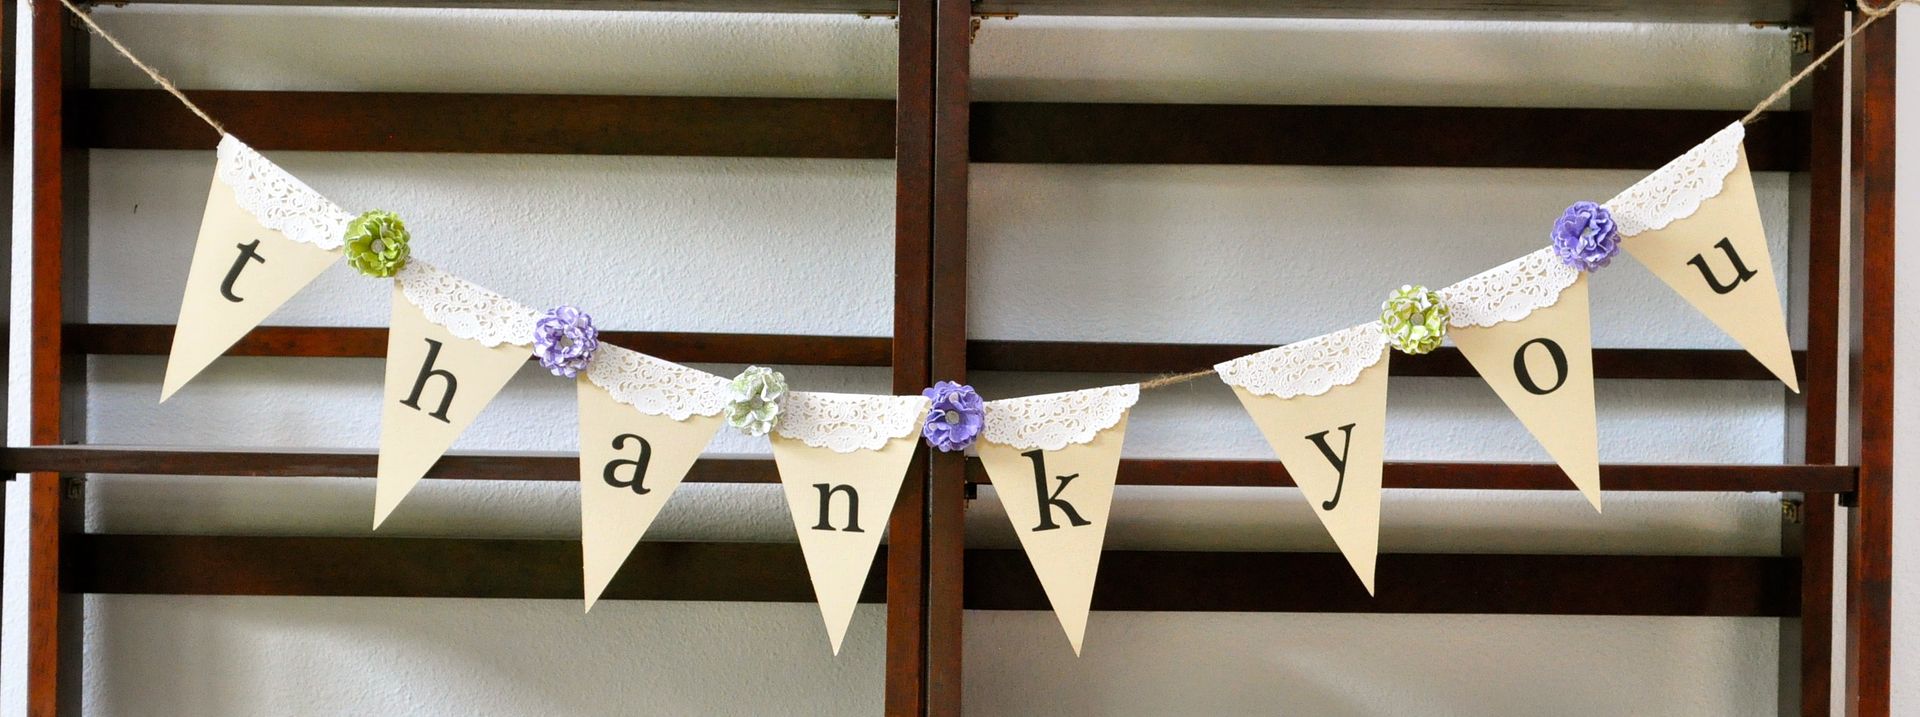
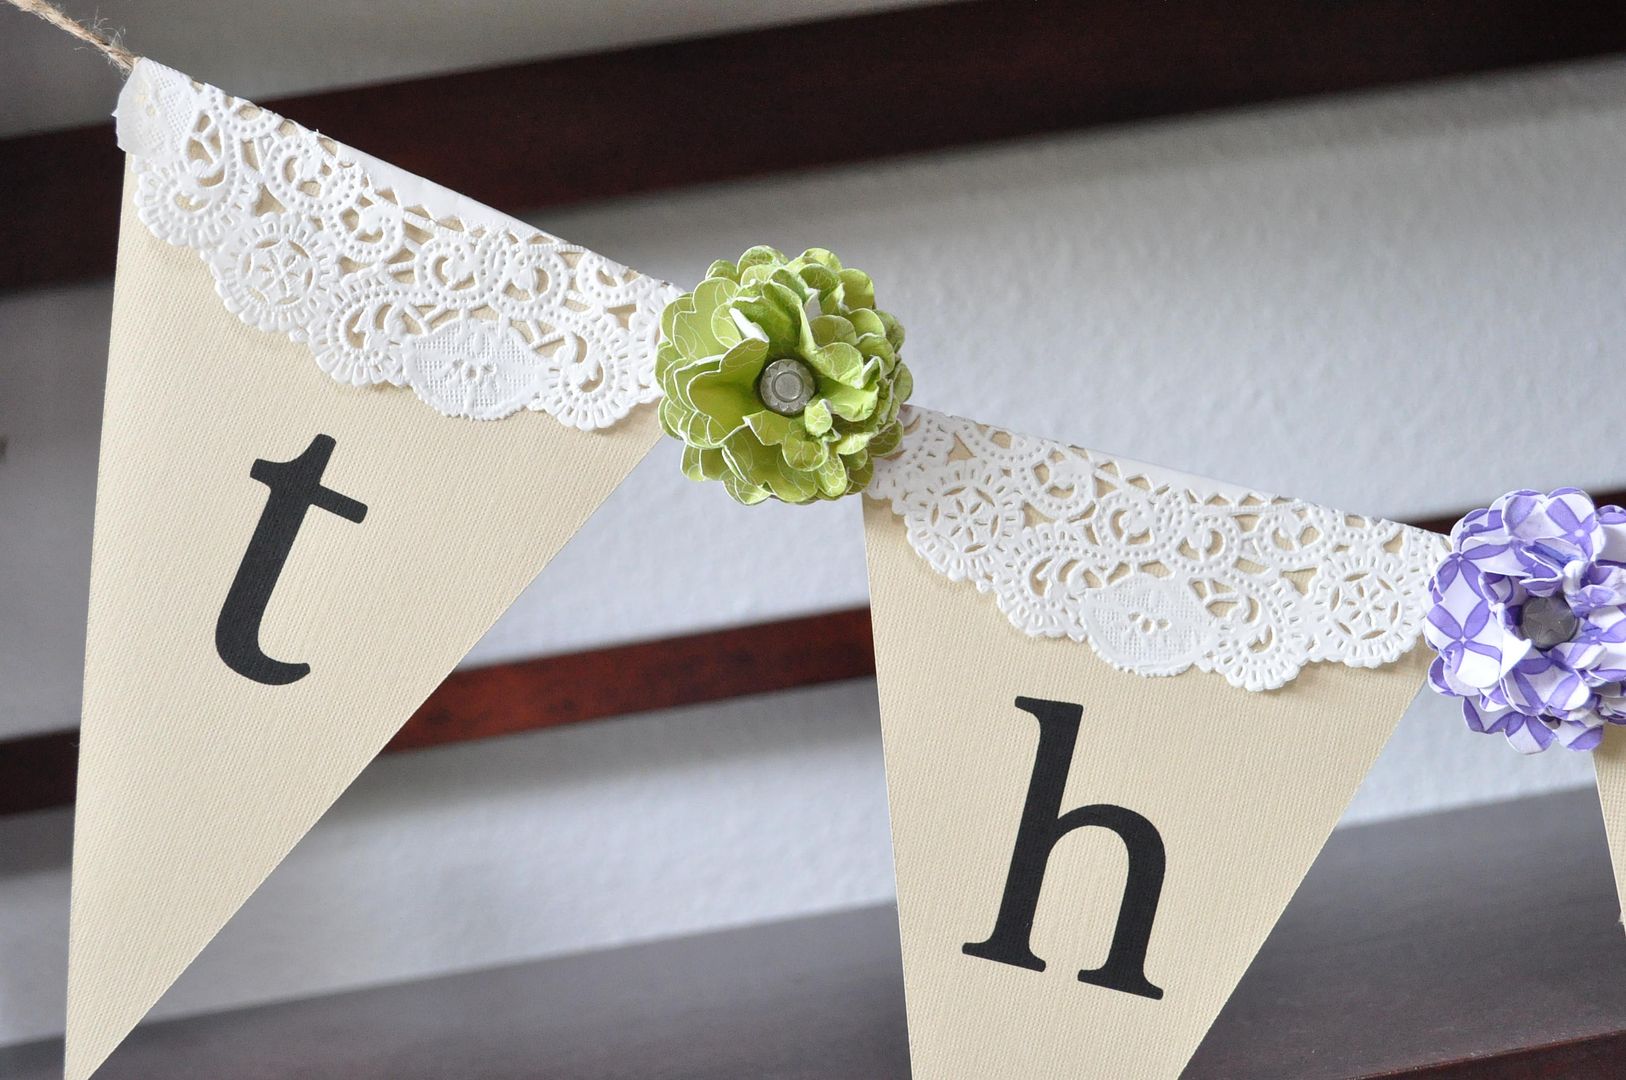
This "Thank You" banner hung over the gift table. It was made the same way as the "Eternity" banner minus the ribbon. I added the same flowers between each letter. 


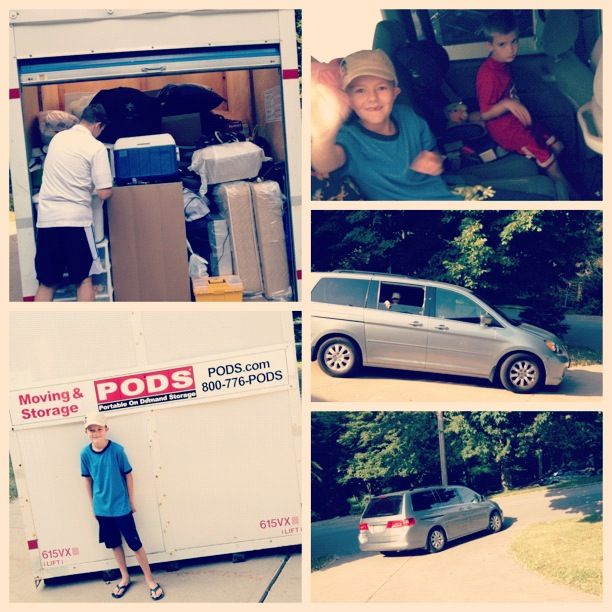
I wish I could've been at that beautiful wedding! I made it just before the final push to get all the packing done. Which reminds me, I have to mention WE MADE IT TO UTAH!! We packed all our belongings (or at least the few things we had dragged to Iowa) in a storage pod, then my husband loaded up the boys in the van and took off on a two-day boys trip to Salt Lake. The baby and I stayed behind to finishing cleaning the house for the next tenants, then headed out on a plane the next day. Can I just say that cleaning and packing in 103-degree weather with 90% humidity is no fun! But we got 'er done.


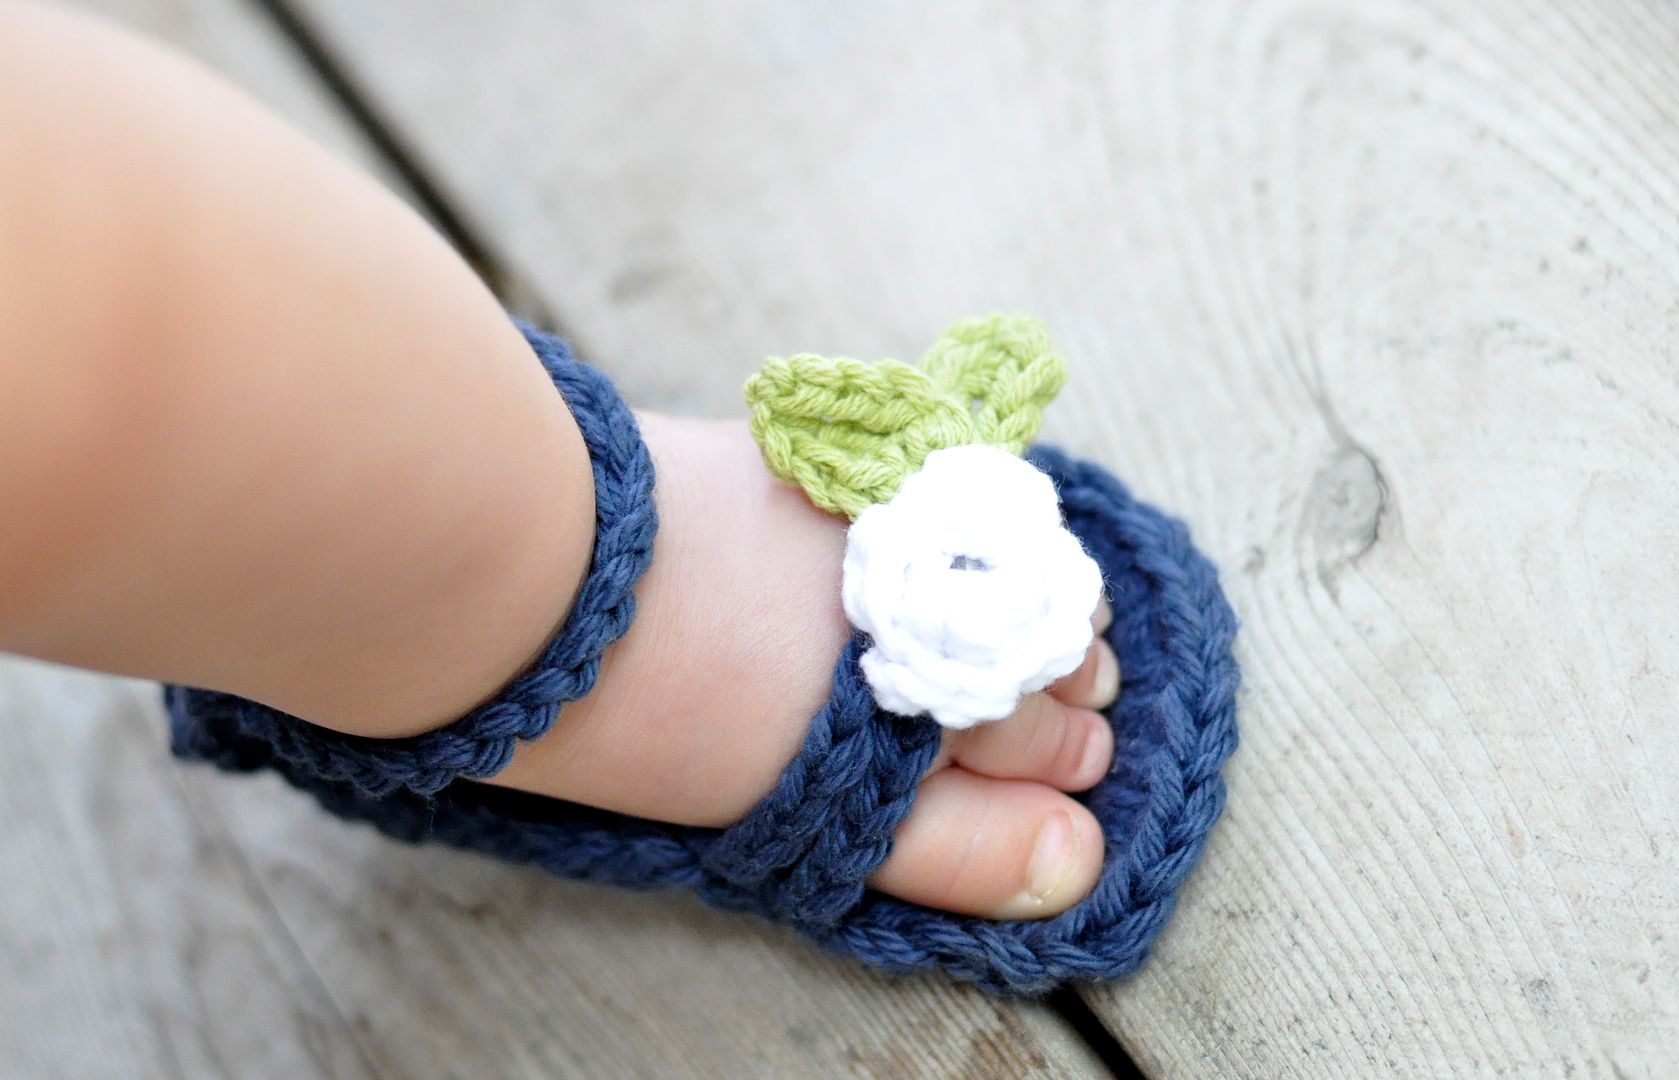
In addition to all that packing and cleaning, I've been working on the newest crochet pattern for my shop. It's been in the works for months, but I've had to put everything on hold to get this move out of the way. Now that it is, you should see this adorable sandal pattern in the shop soon!

Thanks for sticking with us during all these life changes that have slowed my posting down a bit. And thank you so much to my partner Jessica for all the great posts she's been giving you while I made this next transition. Hopefully we'll find a house and be able to get settled soon so the real crafting can resume!


share this on »
{Facebook} {Twitter} {Pinterest}
12 Comments
LinkWithin Related Stories Widget for Blogs